


5 easy steps to master Video Storyboarding
🎬 Quick Summary | 🕓 Updated November 5, 2025
🎯 Goal of this article: discover what a video storyboard is and how it helps you plan, structure, and visualize every scene before production, so you can create clear, consistent, and professional videos.
🧰 What you’ll learn: the essential steps to create a storyboard, from script to shot design, the best tools and templates to use (AI software, storyboard makers), and how to collaborate and share your project easily with your team.
✅ Bonus: get inspiring storyboard examples, free templates to get started, and practical tips to save time in pre-production while improving the quality of your videos.
👥 Who it’s for: content creators, marketing teams, trainers, or anyone who wants to design a professional video easily and efficiently.
To get into the habit of writing a quality storyboard for your corporate videos, you might as well go step by step to set up a process.
Even before shooting and editing your corporate video, you need to take some time to think about it. Video is more than just images and computer graphics. A video is also a message, and this message will be determined in the storyboard. Another crucial point in the storyboard is the segmentation of your video into different sequences. This preliminary work will then serve as a common thread throughout.
In this article, we will guide you step by step, by giving you some advice. For your future storyboards, you will be able to establish a process to follow, to find your way around, and not skip any steps.
What is video storyboarding (sometimes called whiteboard)?
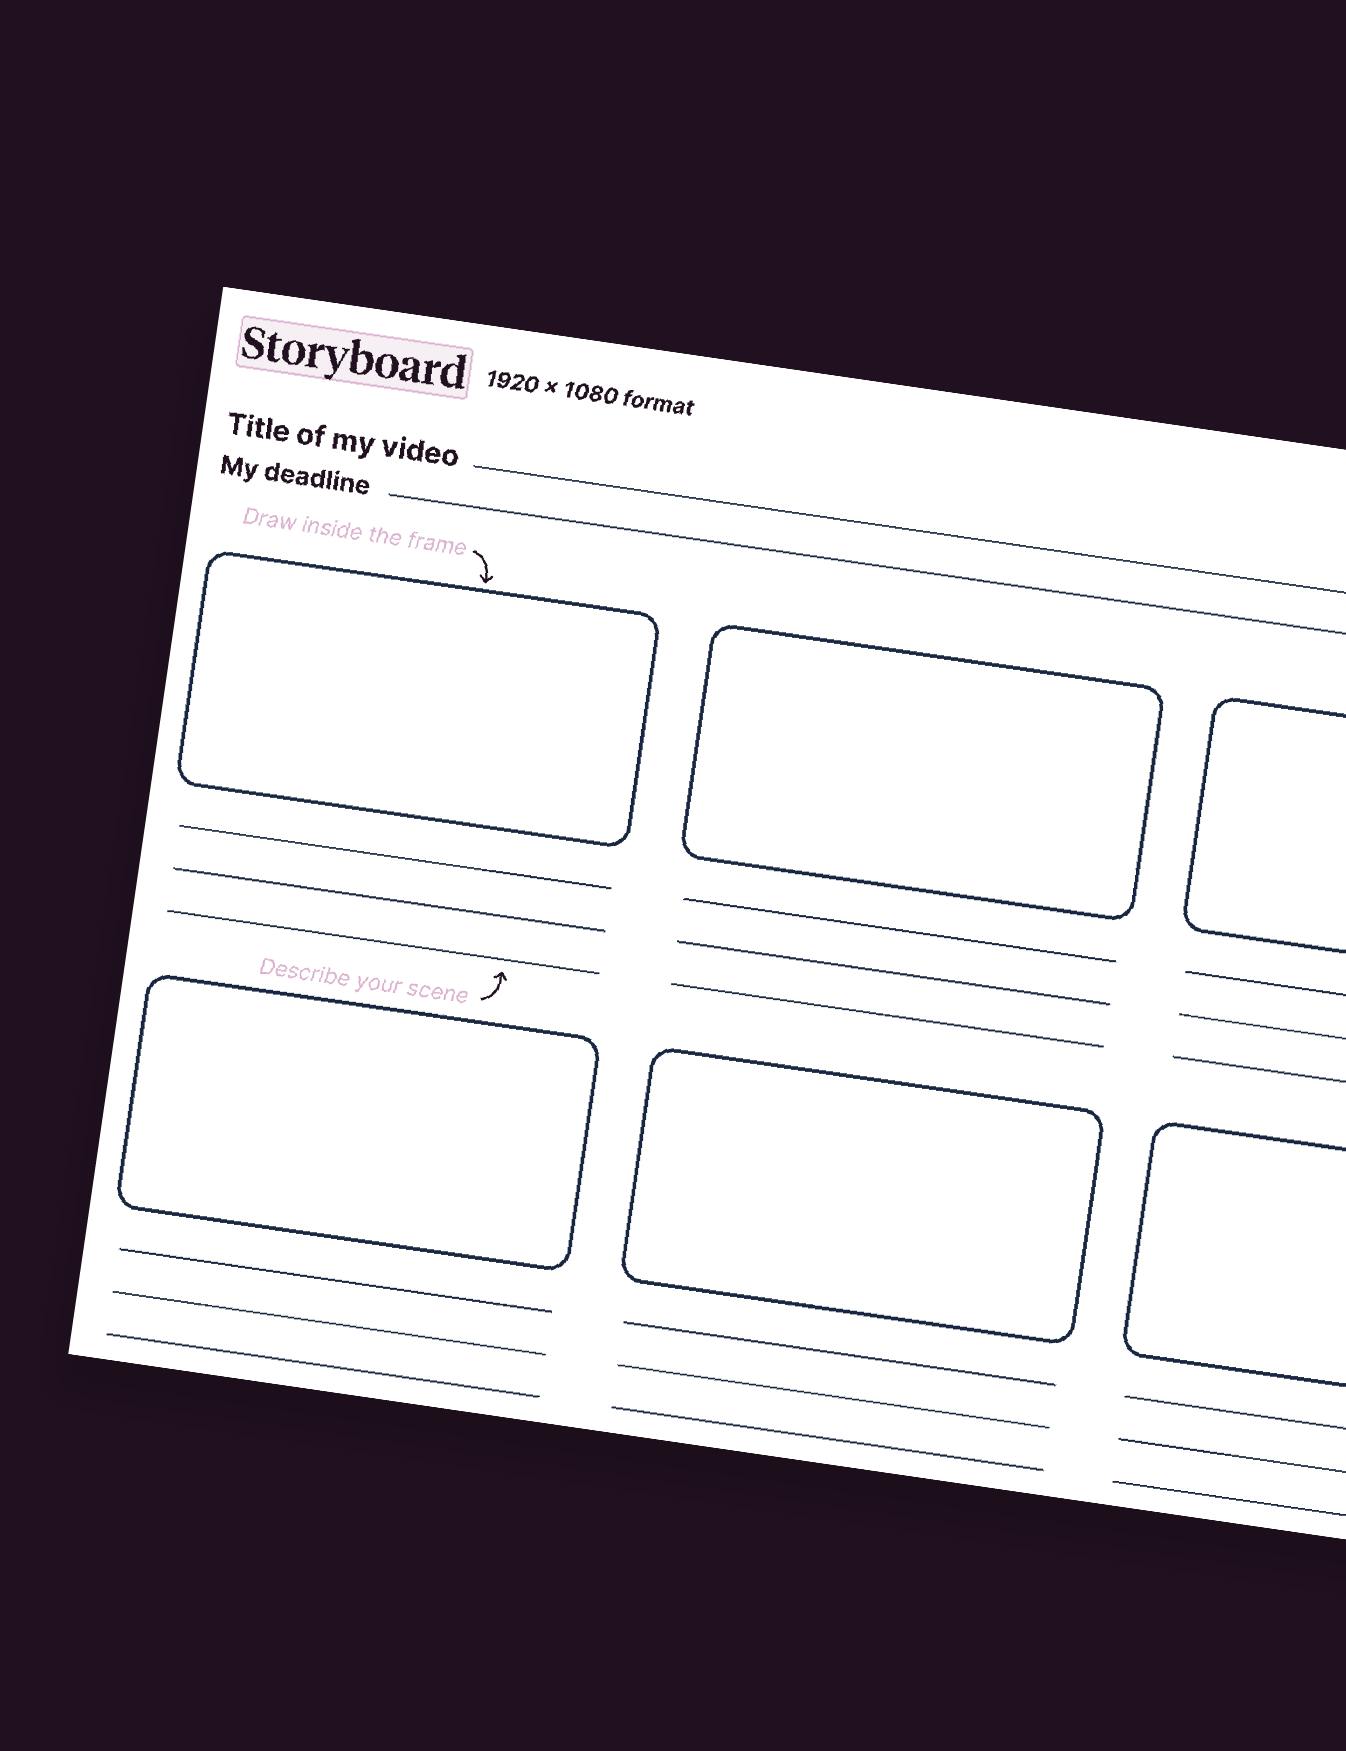
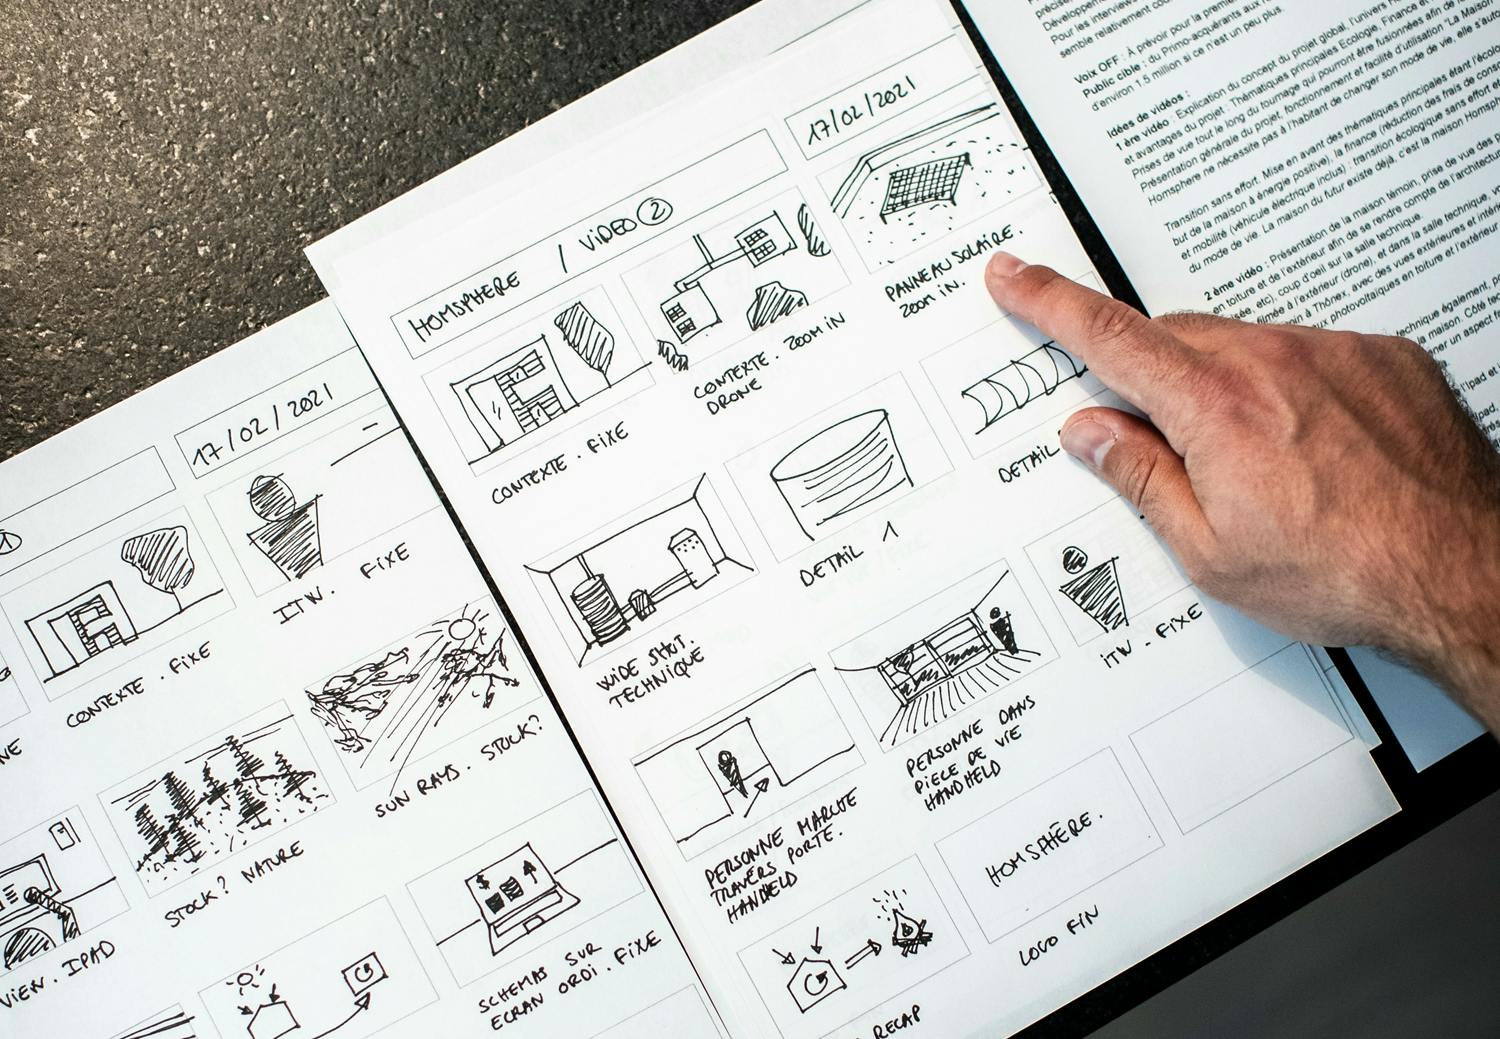
The storyboard is one of the most critical steps of the pre-production of your animation. It works like a comic strip, with each square showing a pencil sketch of a scene from your video. These squares replace slides in a PowerPoint presentation, turning your idea into a clear visual sequence.
Each frame typically includes:
- the characters and their movements,
- the dialogue or voice-over that accompanies the scene,
- the visuals, text, and graphics that will appear on screen.
By putting all these elements side by side, the storyboard offers a simple, visual overview that’s easy for marketers, designers, and team members to understand.
It’s also a practical way to spot inconsistencies between your script and your visuals. You can:
- edit out scenes that don’t serve your story,
- refine transitions between shots,
- and ensure a smooth, coherent narrative before production even begins.
Why is a storyboard important for your videos or film?
A video storyboard is important for many reasons.
The video storyboarding is a central document for any viewer in charge of the creation of the content
Indeed, the storyboard enables you to gather all the data you need to create a powerful video: staging, plan, characters, voiceovers, animations, logo, intro/outro, dialogues, music, subtitles…
A video storyboard enables a better organization of your ideas
A video storyboard guarantees that your ideas are carefully crafted and located in a single place. If you change your mind or if your creative team brings forth new ideas, you have a single document where you can include them.
The storyboard enables the creative teams to work in a single direction
Thanks to the storyboard, the teams can easily understand what is expected in the video. Moreover, you are able to create punchlines and dialogues that you can share with your creative teams for their feedback.
The storyboard helps you to allocate your budget effectively
Since most errors are detected during the storyboarding phase, this allows companies to save time, money, and effort that can disrupt the production phase.
The storyboard helps you to determine the length of your video
The storyboard is a useful tool to organise the shots. Generally, commercial videos last between 15 and 60 seconds. In this case, the storyboard helps you to tell your story in the allocated timeframe.
If you’d like to explore how to make your storyboard work within a complete marketing campaign, check out our article on how to create impactful promotional videos.
Where can you create a video storyboarding?
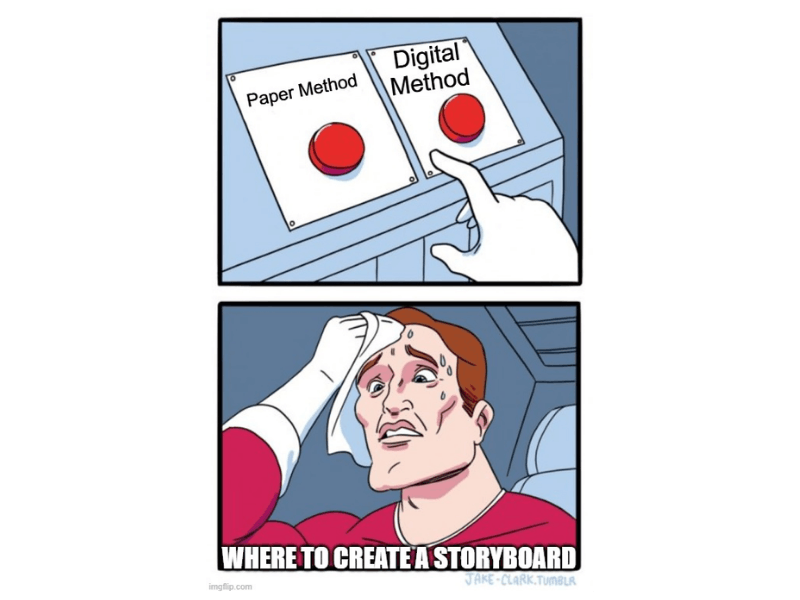
To create a video storyboard, you can choose between two main methods, depending on your skills and how you like to work:
- The paper method:
This is the traditional, hands-on approach. You draw each scene on sheets of paper or directly on a whiteboard, much like a comic strip. It allows you to express ideas freely and visualize the story’s flow in a tangible way.
Many creative teams still love this method because it sparks discussion and spontaneity. However, it can be time-consuming, and if you’re not comfortable drawing, it may feel limiting when you need to refine details or share your vision with others.
- The digital method:
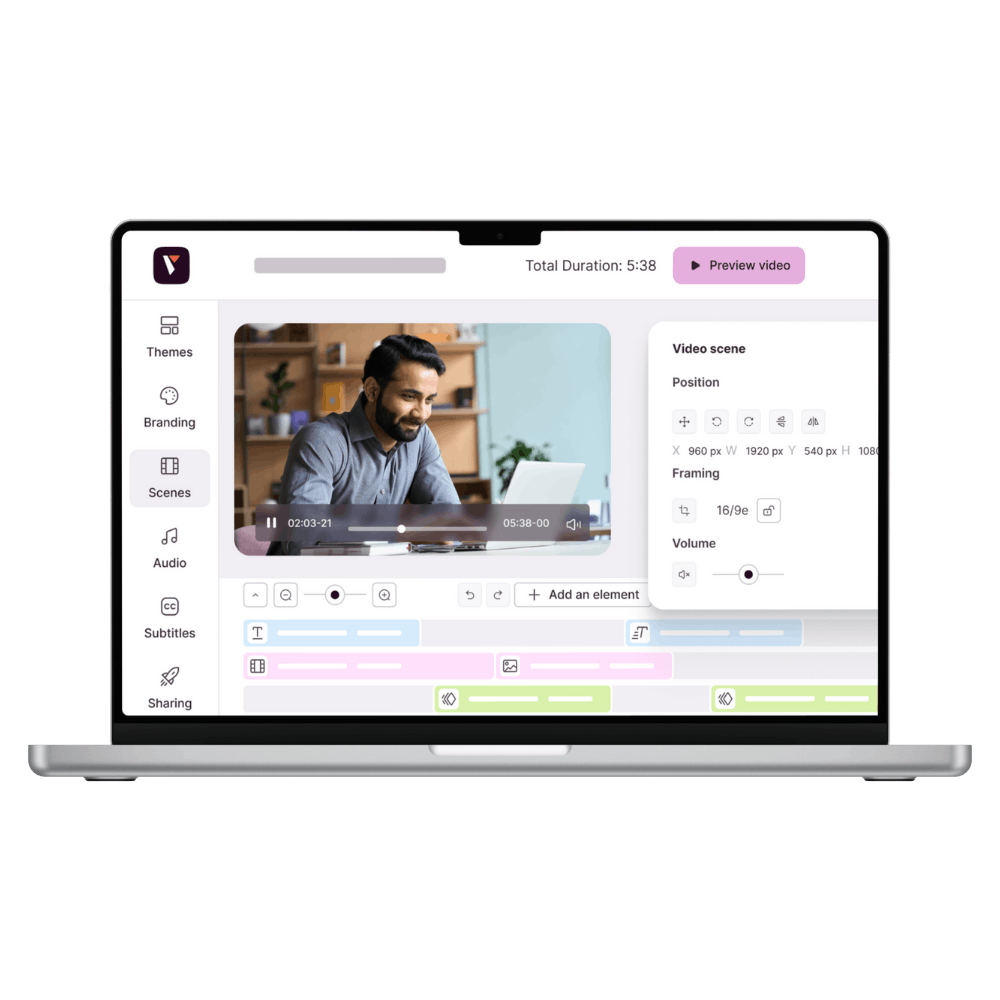
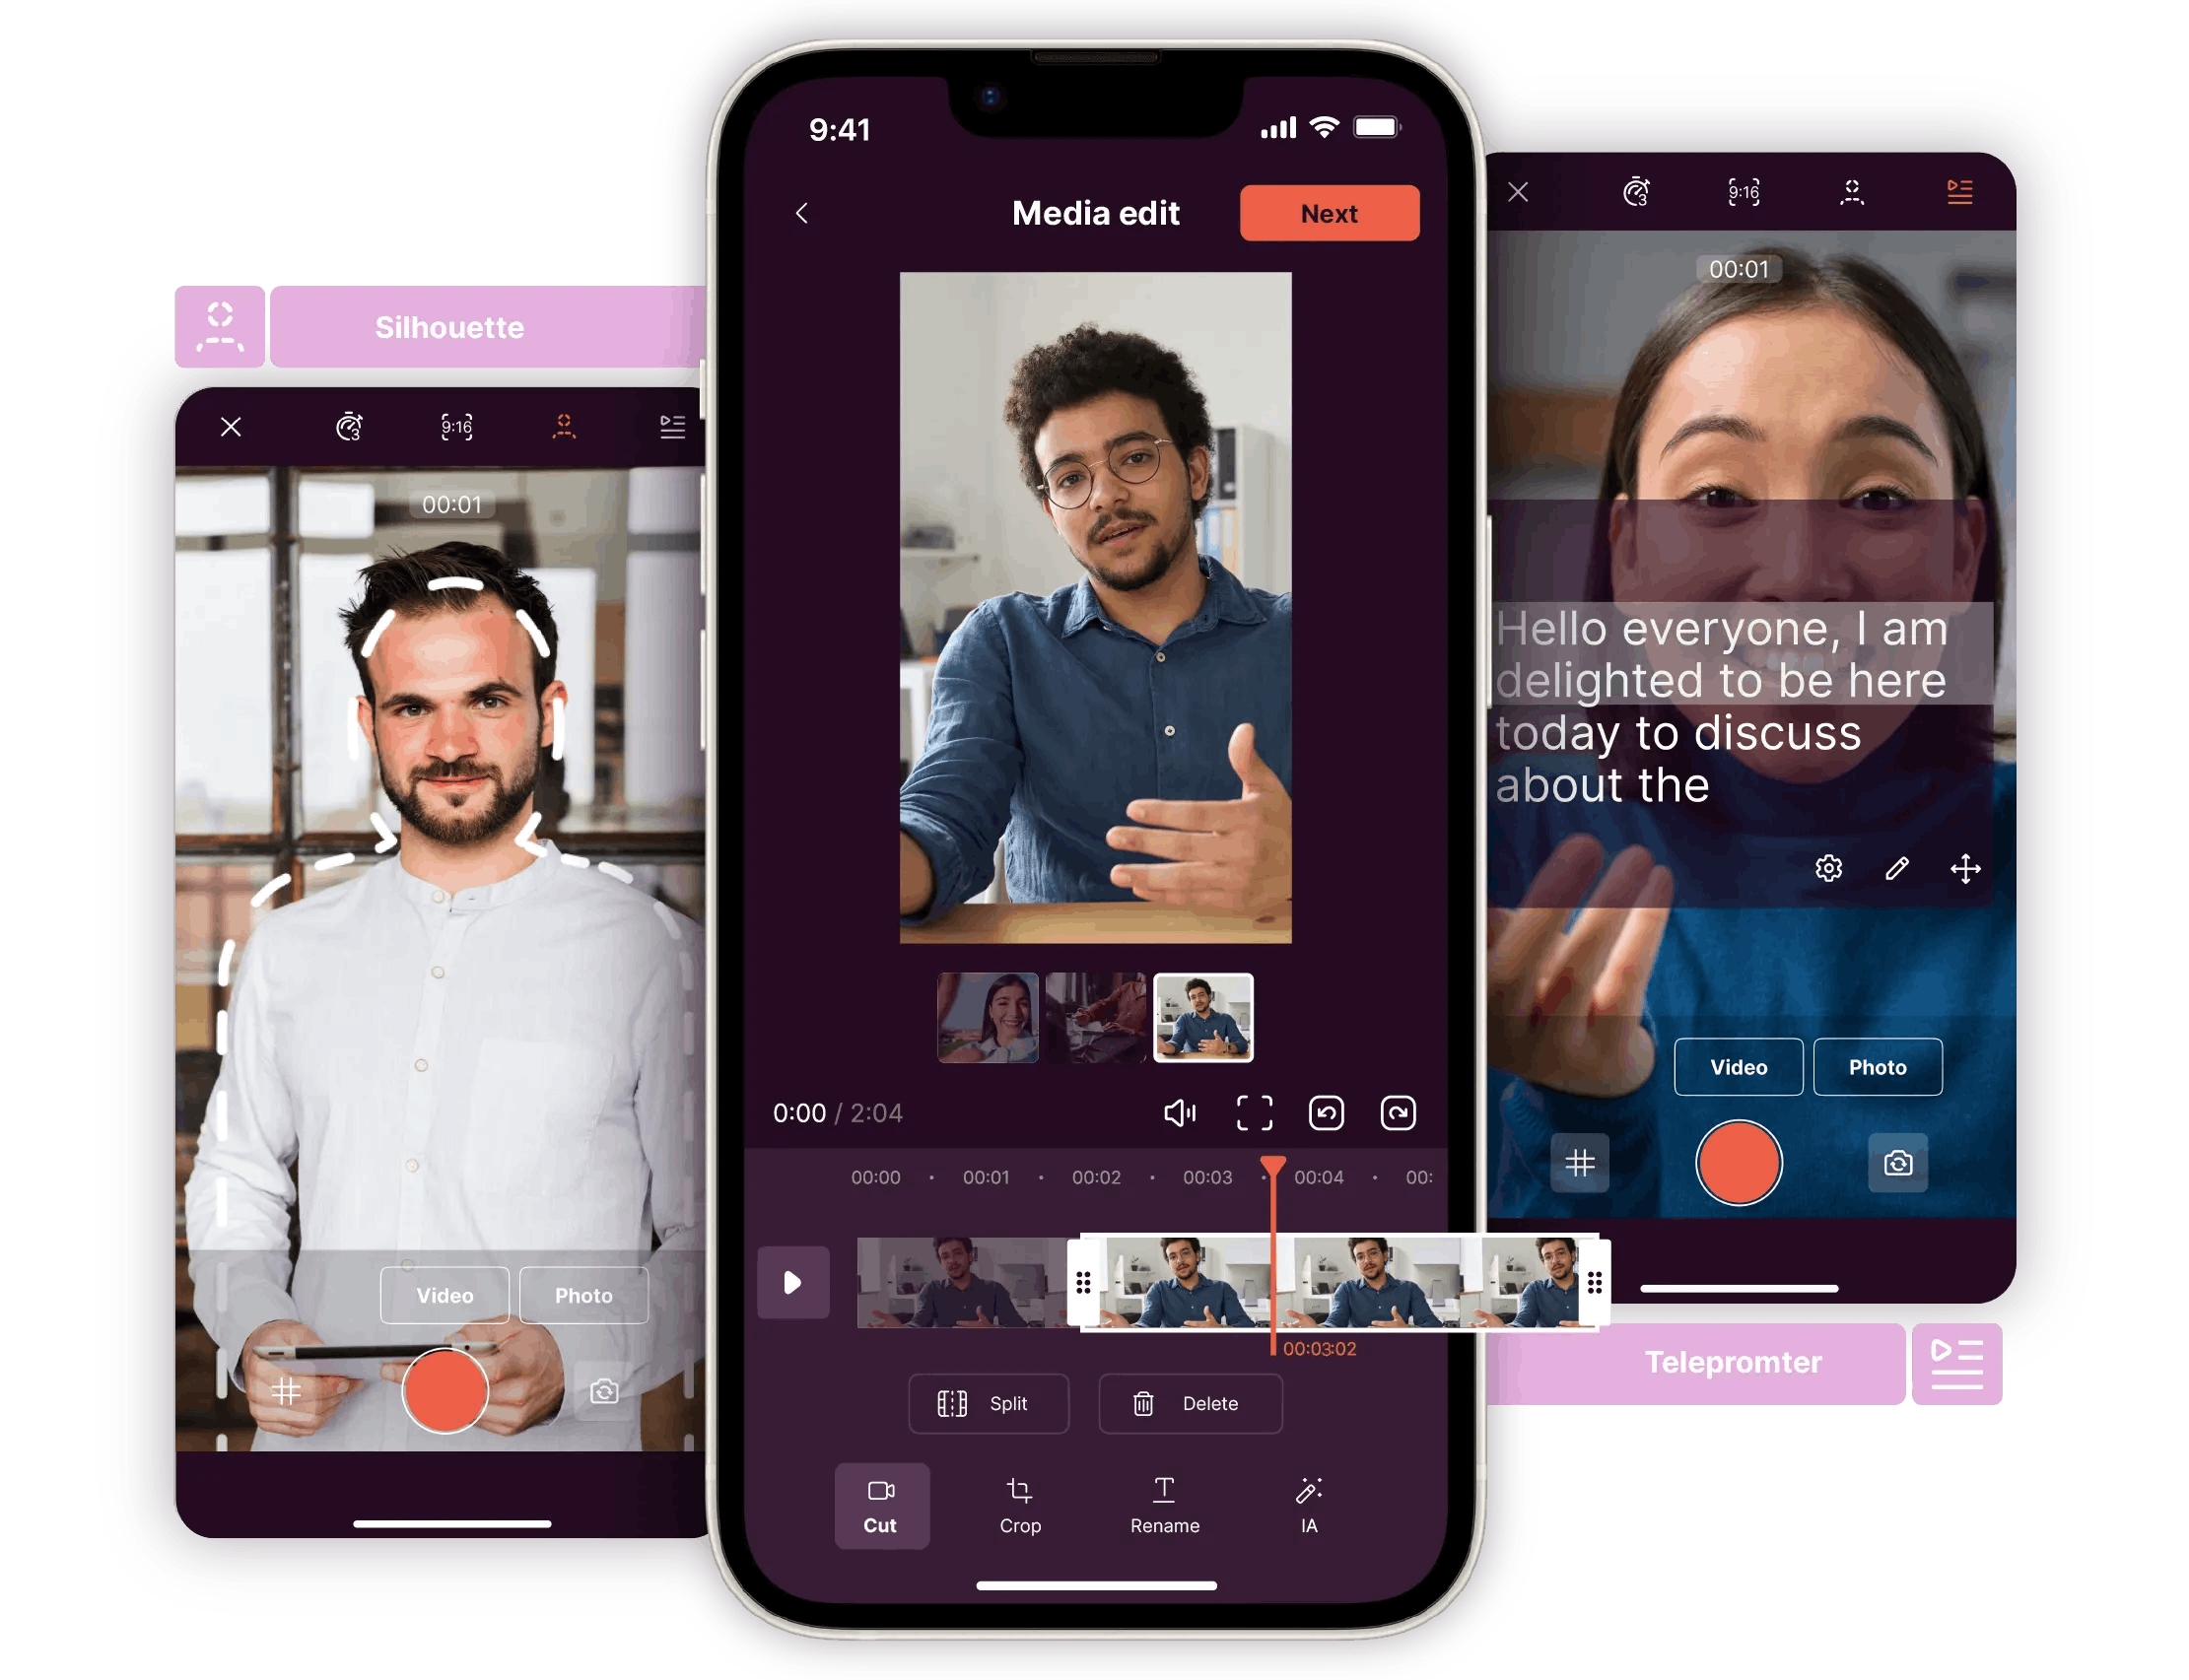
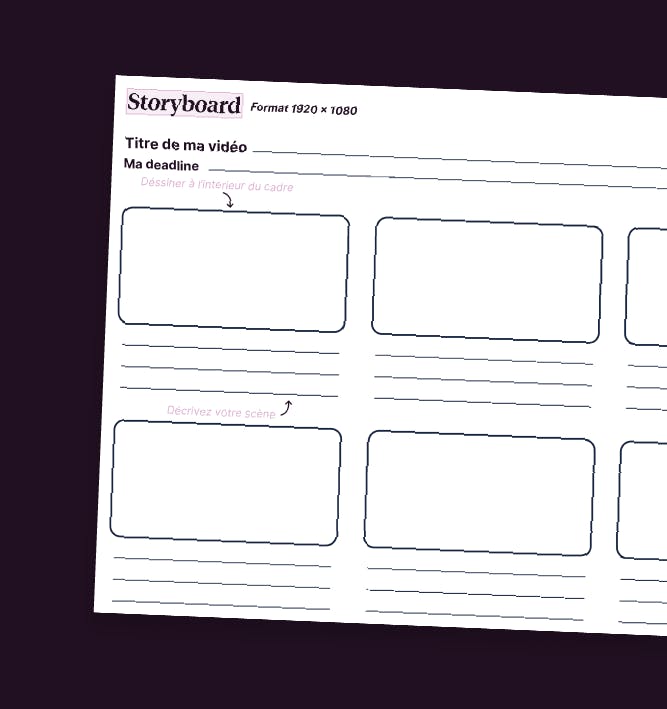
This modern alternative relies on dedicated software or online platforms that offer pre-formatted templates. Instead of sketching, you can drop in visuals, notes, or even AI-generated scenes. It’s ideal for those who want to work efficiently, make quick updates, and collaborate remotely.
You can use Canva for a simple and intuitive start, PowerPoint if you prefer a familiar format, or try Pitchy, which provides an all-in-one platform to design, adjust, and turn your storyboard into a professional video ready to publish.
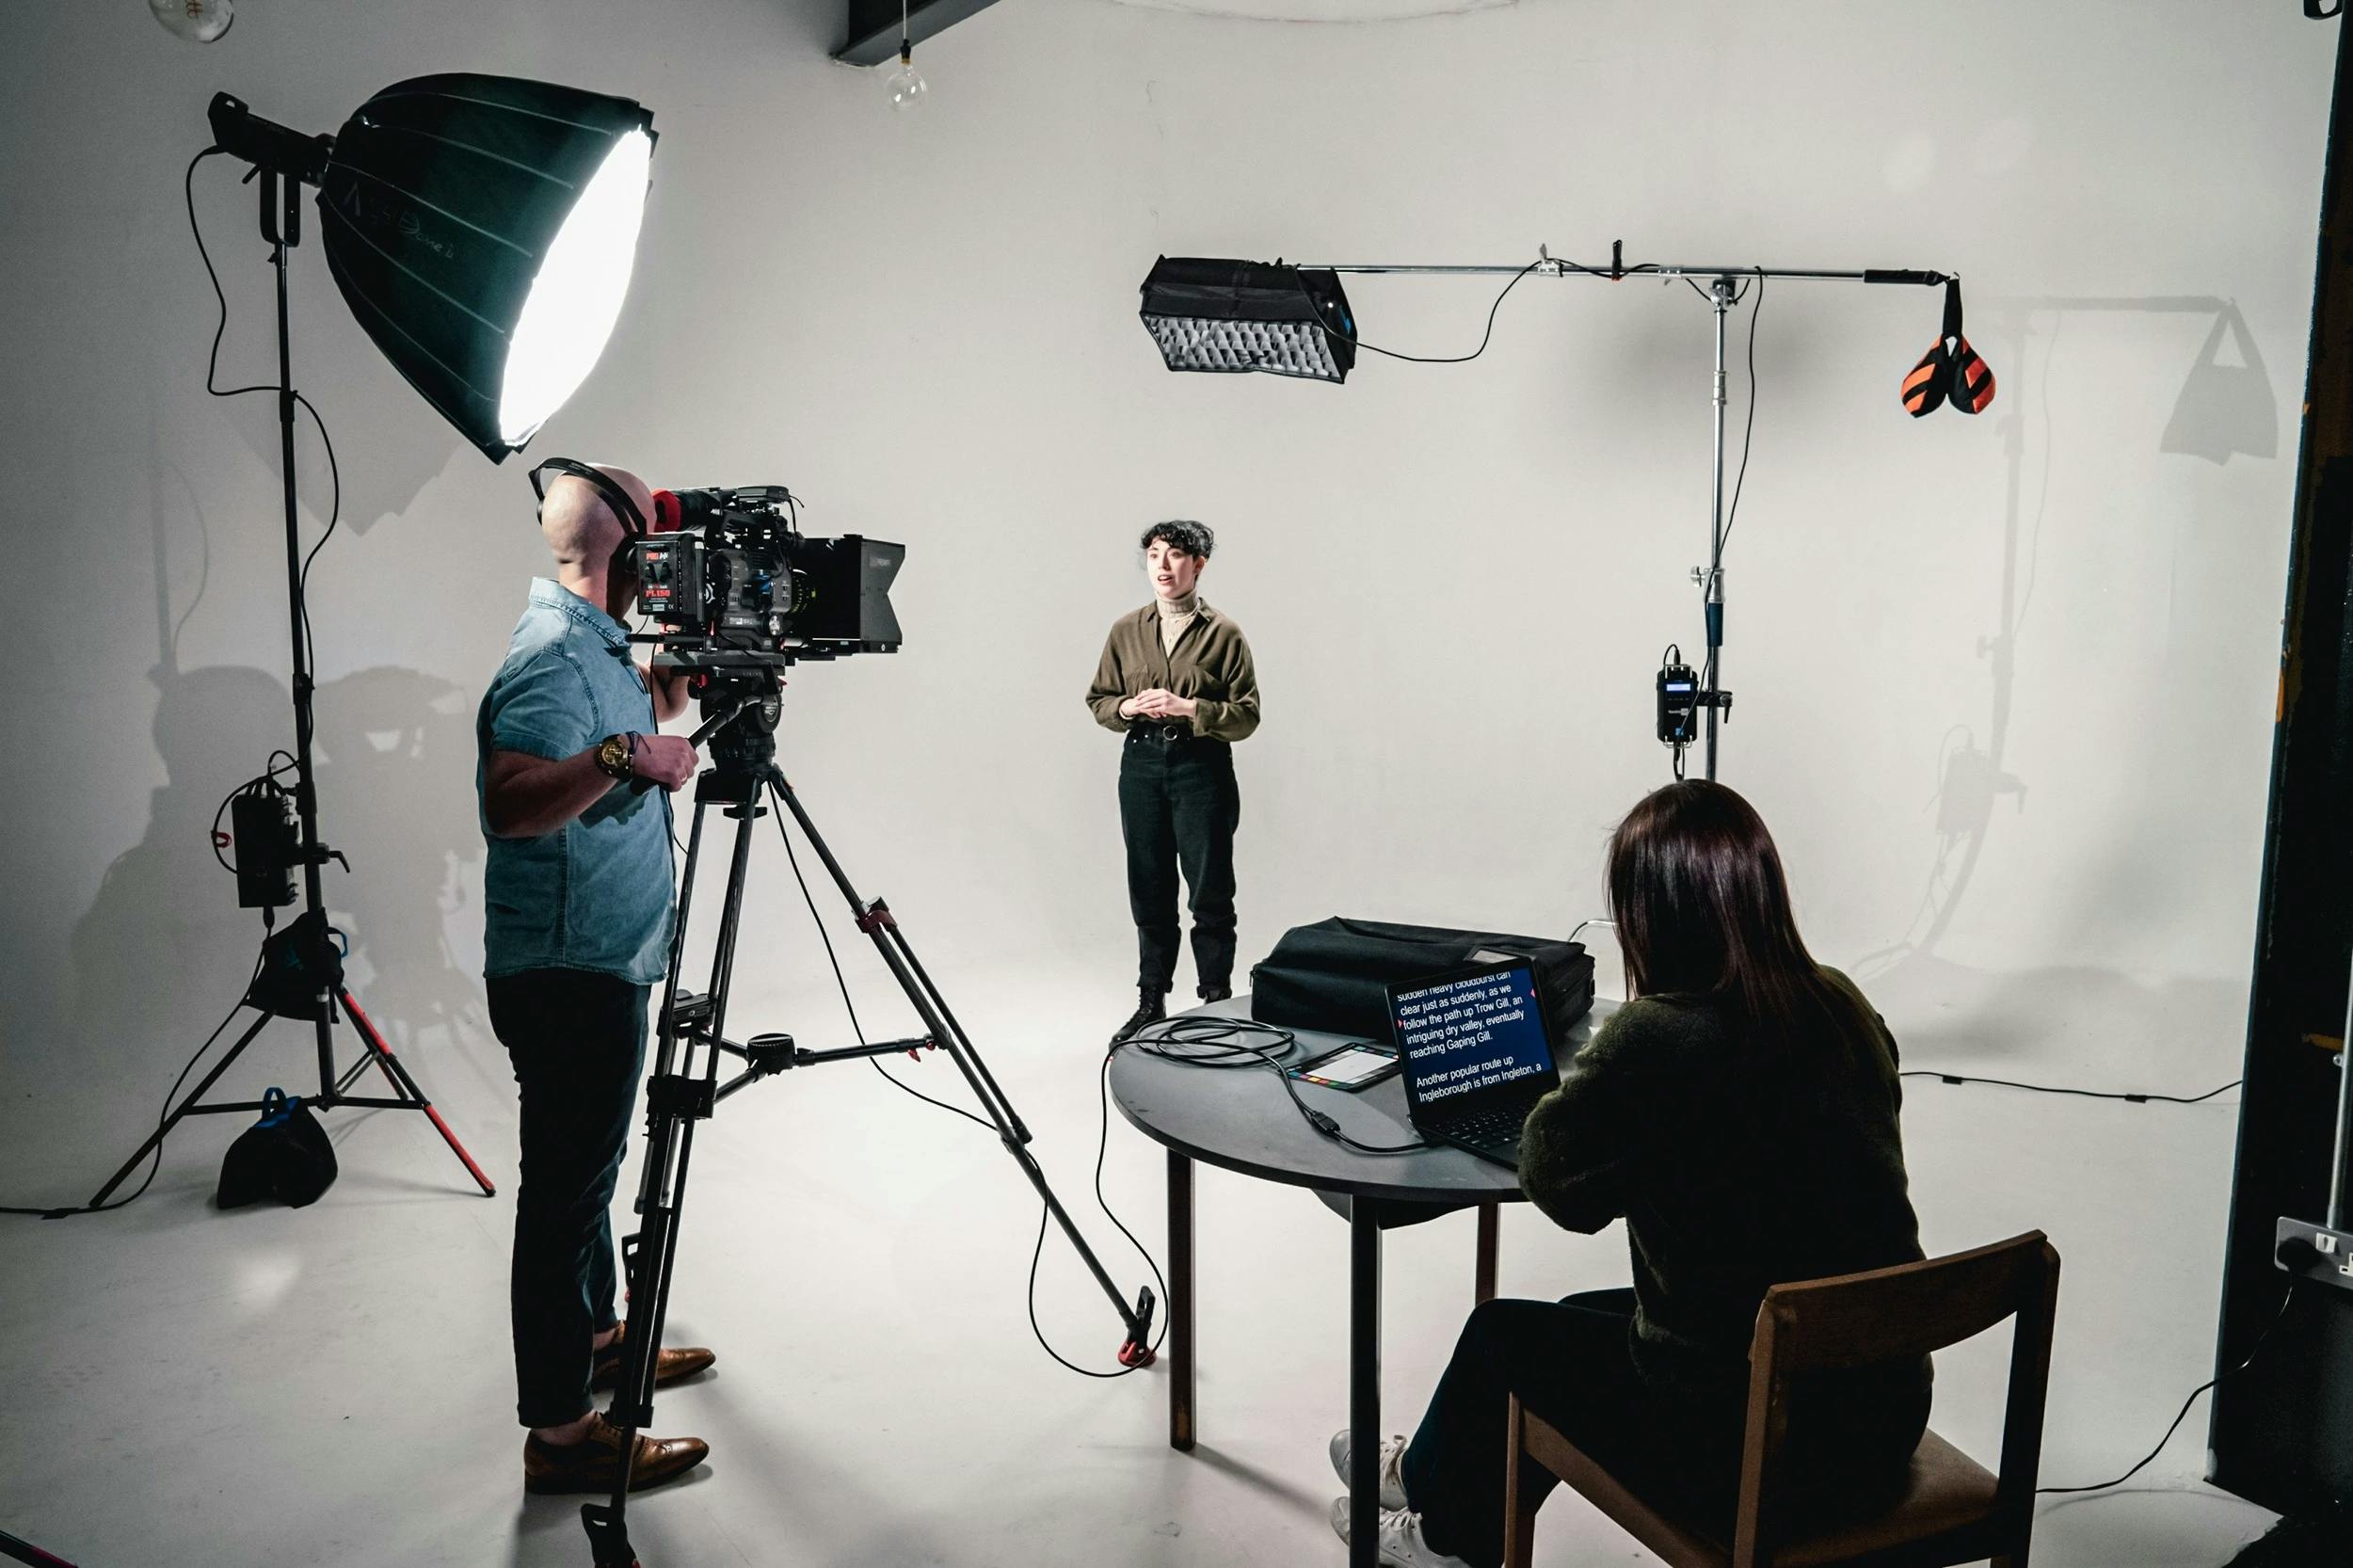
Once your storyboard is complete, you can move on to the next stage: editing. If you want to learn the basics, take a look at our beginner’s guide to online video editing.
5 steps to create a video storyboarding
Do you need to create a video storyboard but don’t know where to start? Then, we have good news for you: you don’t need to be a certified artist to create a video storyboard. You just need to follow the following 5 steps to get the video storyboard of your dreams.
Step #1: Plan your video
At this stage, you will clarify several elements before visualising your video:
- your objectives
- the key message you want to convey to your viewers
- the length of your video
- the platforms where your video will be shared according to your marketing strategy
Step #2: Write every scene in detail in each square (length, characters, setting)
At this stage, you will need to write the details of your script to get an accurate vision of your video. You can include the following elements: • The elements of the set • The expression and positioning of the actors • The dialogues between the participants • The subtitles • The verbatims and keywords to highlight • Special effects • The composition of the video (e.g. lighting, foreground/background, color palette…) • The filming of your video (close-up, American shots…).
Step #3: Draw your scenes (notes, action, length, movement)
A picture or a drawing can be worth a thousand words. That’s why you should pay the utmost attention to the drawings in your storyboard’s boxes. Don’t forget to emphasize the movements, emotions and attitudes of your characters. You can even use dialogue bubbles, just like in comics strips. At the end of this stage, your storyboard should look like a comic book.
Step #4: Identify the key moments in your video for the viewer
As you know, the messages conveyed by video are retained more easily than text. However, you must be aware that not all your videos will be retained by your audience. Therefore, be careful to highlight the information that matters the most in your video: keywords, images, numbers, dates, places, time, names, positions, verbatims, and other highlights.
Step #5: Finalize your storyboard
Before going to your video production, you’ll need to review your storyboard to detect any error. You can also seek the input of your creative team to add new ideas, if need be.
Writer’s Note
There’s something almost magical about the moment a story leaves your head and lands on paper. That’s what storyboarding does, it transforms imagination into a sequence of clear, visual ideas. Personally, it’s one of my favorite steps in the creative process. It’s where I can test, rearrange, and play with concepts before they become real.
A good storyboard helps you see your video from a new angle and understand how each scene connects, to make sure your message flows naturally. Whether I’m sketching on paper or using a digital template, that first visual draft always sparks new inspiration.
What I’ve learned over time is that structure doesn’t limit creativity, it enhances it. Once the framework is clear, your ideas have more space to breathe. And with a tool like Pitchy, that process becomes faster, smoother, and honestly, more enjoyable.
From storyboard to screen with Pitchy
A good storyboard gives your video structure and flow while keeping every idea connected. It helps you organize your thoughts and define each scene so your team stays aligned before production even begins.
With Pitchy, you can take this preparation one step further. The platform lets you design your storyboard online, adjust frames and dialogues, add visuals, and collaborate in real time, all within an intuitive workspace built for creative teams.
Every idea deserves a clear visual plan. Pitchy turns that plan into reality by helping you move from concept to finished video quickly and confidently.
Ready to create your storyboard? Request a free demo and explore how Pitchy helps you bring every story to life.

A passionate Content Manager at Pitchy, Marc excels in designing and implementing captivating strategies, combining hard-hitting writing and in-depth analysis to bring you the best information!
Resources
Most popular resources
Storyboard
A ready-to-use storyboard to help you create great videos!

Get our all-in-one kit to kickstart your video projects effortlessly!
Master the initial phases of a video project!
How to make a professional quality interview with a smartphone ? Watch the replay now!